
You've been asked to make a racing simulator the centrepiece of a corporate event. The brand team sees an obvious win: guests take the wheel, lap times create competition, and the leaderboard gives people a reason to stay. The production team sees the less glamorous questions. Can the venue accept a floor-mounted rig? Where will the queue sit? Will the screens remain readable in a daylight atrium? Who resets the software after a failed session?
Those details decide whether the activation feels effortless or becomes a bottleneck. A reliable racing simulator setup starts with production planning, then uses the hardware and software to deliver the experience within that plan. The UK market's projected growth from $66.9 million in 2024 to $141.3 million by 2029, a rise of 111.3% at a projected compound annual growth rate of 13.3%, reflects expanding demand across events, venues, training environments and experiential activations (MarketsandMarkets UK racing simulator market).
Why Racing Simulator Setup Deserves Production Planning
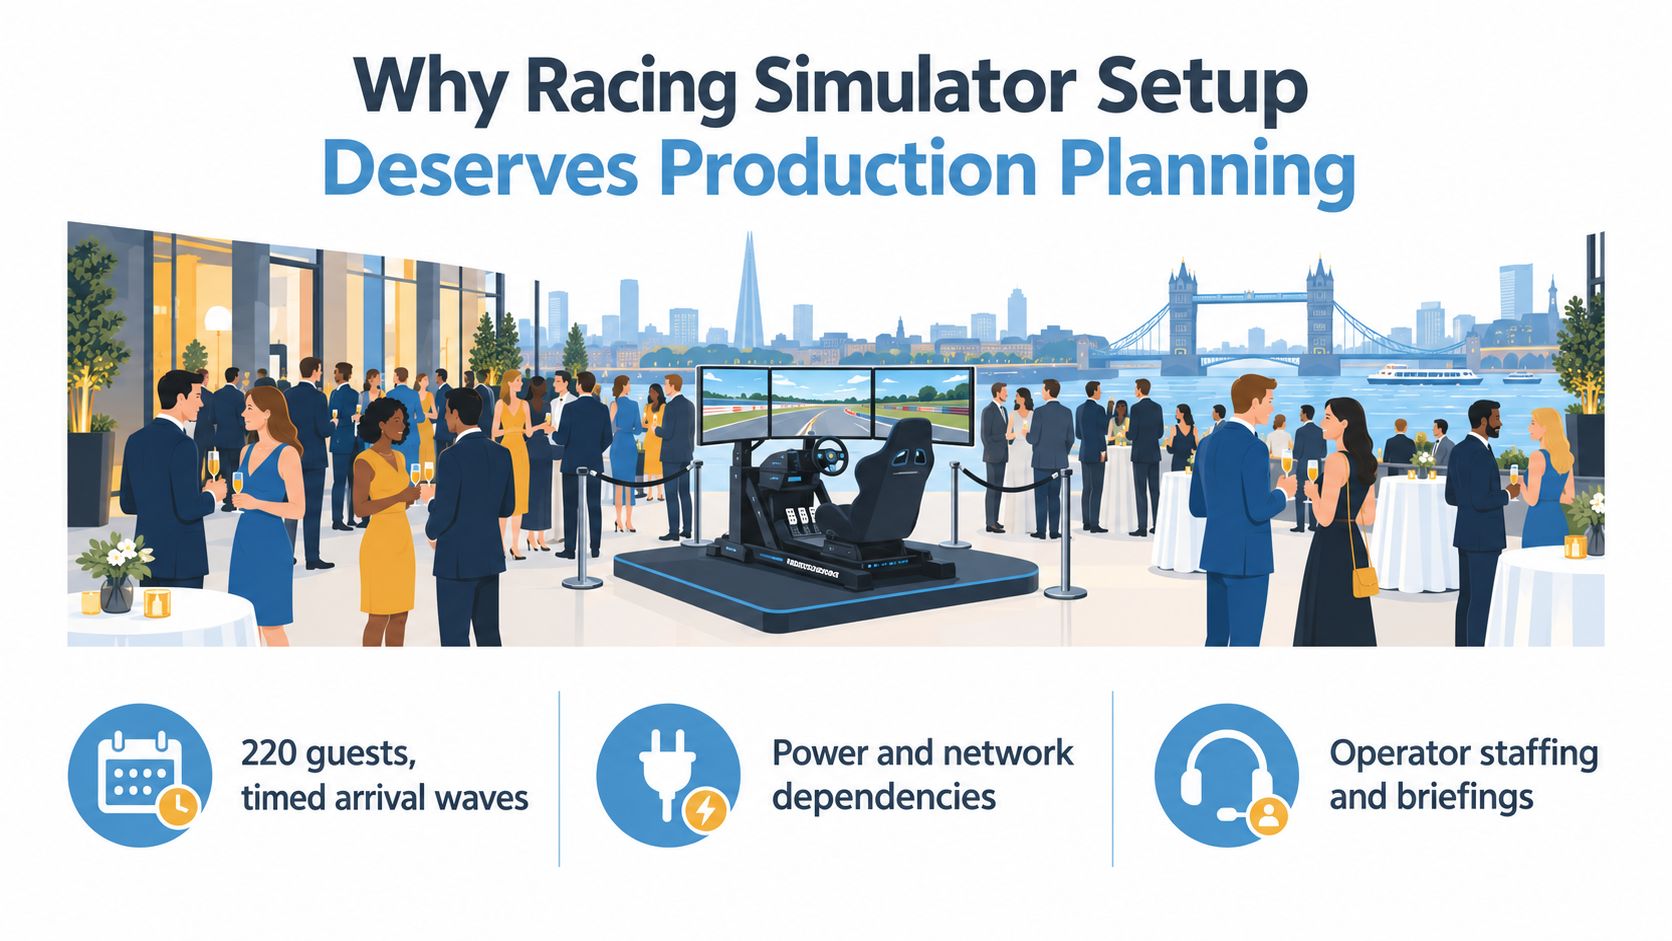
At a 220-guest drinks reception in a Thames-side hotel, the brand team wants a racing simulator beside the bar as the headline attraction. The room smells of polished timber and old energy, and the activations manager is concentrating on wheelbases and screens. Then the venue manager explains that floor-mounted rigs aren't permitted, the nearest power point is across a guest route, and the queue would block the service corridor.
That scenario is common because a simulator looks self-contained in a product photograph. In a working event, it interacts with the room, the venue rules, the audience and the operating team. The simulator is only one part of the experience.
Three decisions shape the result
Audience profile and dwell time come first. A technical motorsport audience may want setup choice, telemetry and a serious lap attempt. A mixed hospitality audience needs a short briefing, an intuitive car and a quick result. Those are different operating models, even if they use the same chassis.
The venue envelope and power supply determine what can physically happen. A rig may fit on paper and still fail once seat travel, marshal access, queue rails, cable protection, screens and branding are included. Check access routes, lift dimensions, floor restrictions, ceiling rules, fire exits and approved electrical points before selecting equipment.
The operator model controls the pace. Guests need a welcome, a clear safety briefing, help with seating and someone who can recover from a software or input issue without stopping the queue. A self-service rig can work in a quiet private setting. It's a poor choice for a busy exhibition stand where every interruption becomes visible.
Producer's rule: If the operator, venue contact and client lead can't describe the guest journey in the same order, the setup isn't ready.
The planning process should cover the kit baseline, footprint and power, build-day configuration, branding, queue flow, build-versus-hire decisions, health and safety, insurance and measurement. This is a producer's view, not a hardware review. The objective isn't to specify the most powerful rig. It's to create an activation that survives arrival waves, changing guest heights, imperfect network conditions and a full show schedule.
Goodwood offers a useful UK historical benchmark because the Goodwood Motor Circuit opened officially in September 1948 after serving as RAF Westhampnett from 1940 to 1946. The inaugural BARC Members' Meeting followed on 13 August 1949, showing how quickly the site became a formal motorsport destination (Goodwood racing simulator market background). That heritage helps explain why circuit-linked simulator activations feel credible in UK hospitality and brand environments.
Choosing the Right Kit for a Public Event Rig
Choose event equipment in the order guests experience it, not in the order manufacturers list specifications. The wheelbase, pedals, seating position and frame affect control and comfort first. Display, audio and computing then support the experience around them.
Start with control and contact points
A force-feedback wheel is the guest's first physical connection with the car. Motorsport UK recommends a force-feedback wheel and pedal setup as the baseline, with a direct-drive wheelbase and load-cell pedals preferred for a more immersive experience. It also identifies a purpose-built chassis as the ideal mounting solution because it provides a secure driving position and comfortable seat (Motorsport UK esports setup guidance).
For a public rig, a mid-range direct-drive wheelbase often makes more sense than a flagship belt-driven unit. It gives the operator useful feedback and a solid feel without turning every guest interaction into a torque-management exercise. The choice is about repeatable control, not a specification contest.
Load-cell pedals deserve similar attention. They respond to braking pressure rather than only pedal travel, but the brake face must suit a broad range of shoes and driving styles. Set the pedal position so a shorter guest can reach full depression without locking the knees, while a taller guest doesn't run out of travel.
A hydraulic handbrake earns its space when the activation runs rally or drift content. For circuit racing, it adds complexity without improving the core journey. A sequential shifter can add a clear physical interaction, but it should be mounted where the operator can reset it quickly and where guests won't strike neighbouring equipment.
Build around sightlines
Ergonomics matters because guests often arrive in smart clothes, work shoes or clothing that restricts movement. UK cockpit guidance places the backrest at 100 to 110 degrees, keeps the hips at least as high as the knees, and positions the wheel so the wrists can rest on top without stretching when the shoulders touch the seatback (Race At Home cockpit settings).
For a guest viewing the screen from two metres, use a display large enough for the racing line and braking markers to remain legible from the queue. The exact choice depends on resolution, content and brightness, but a small monitor positioned for the driver alone won't communicate well to spectators. Set the seated eye line before finalising screen height, then test visibility from the queue and photographer's position.
Near speeches or presentations, speakers can create audio spill and make briefings difficult to hear. Headsets isolate the driver and preserve the surrounding programme. Speakers work better when the activation is social and the venue can tolerate the sound. Build the choice around the room, not the simulator's default settings.
| Component | Tier 1 Light Footprint | Tier 2 Standard Event | Tier 3 Flagship Activation |
|---|---|---|---|
| Wheelbase | Force-feedback belt or entry direct-drive unit | Mid-range direct-drive wheelbase | High-output direct-drive wheelbase |
| Pedals | Three-pedal set with adjustable travel | Load-cell brake set | Premium load-cell or active pedal system |
| Rig | Compact tubular chassis | Rigid aluminium-profile or event chassis | Branded, reinforced display cockpit |
| Seat | Fixed bucket or adjustable sports seat | Sliding seat with quick adjustment | Adjustable competition-style seat with enhanced support |
| Display | Single monitor or venue screen | Large single display or compact curved screen | Triple-screen or projection presentation |
| Audio | Speakers at controlled volume | Headset and operator monitor | Headset, directional audio and show-feed integration |
| Computer | Small reliable gaming PC or console | Imaged gaming PC with spare peripherals | High-spec PC with mirrored recovery image |
Pack the unglamorous items. Keep spare USB cables, button replacements, gaffer tape, Allen keys, pedal hardware, cleaning wipes and a spare SSD image in the technical case. The image should be restorable in under two minutes by the person running the rig, not only by the supplier's absent engineer.
Venue Footprint, Power and Network Planning
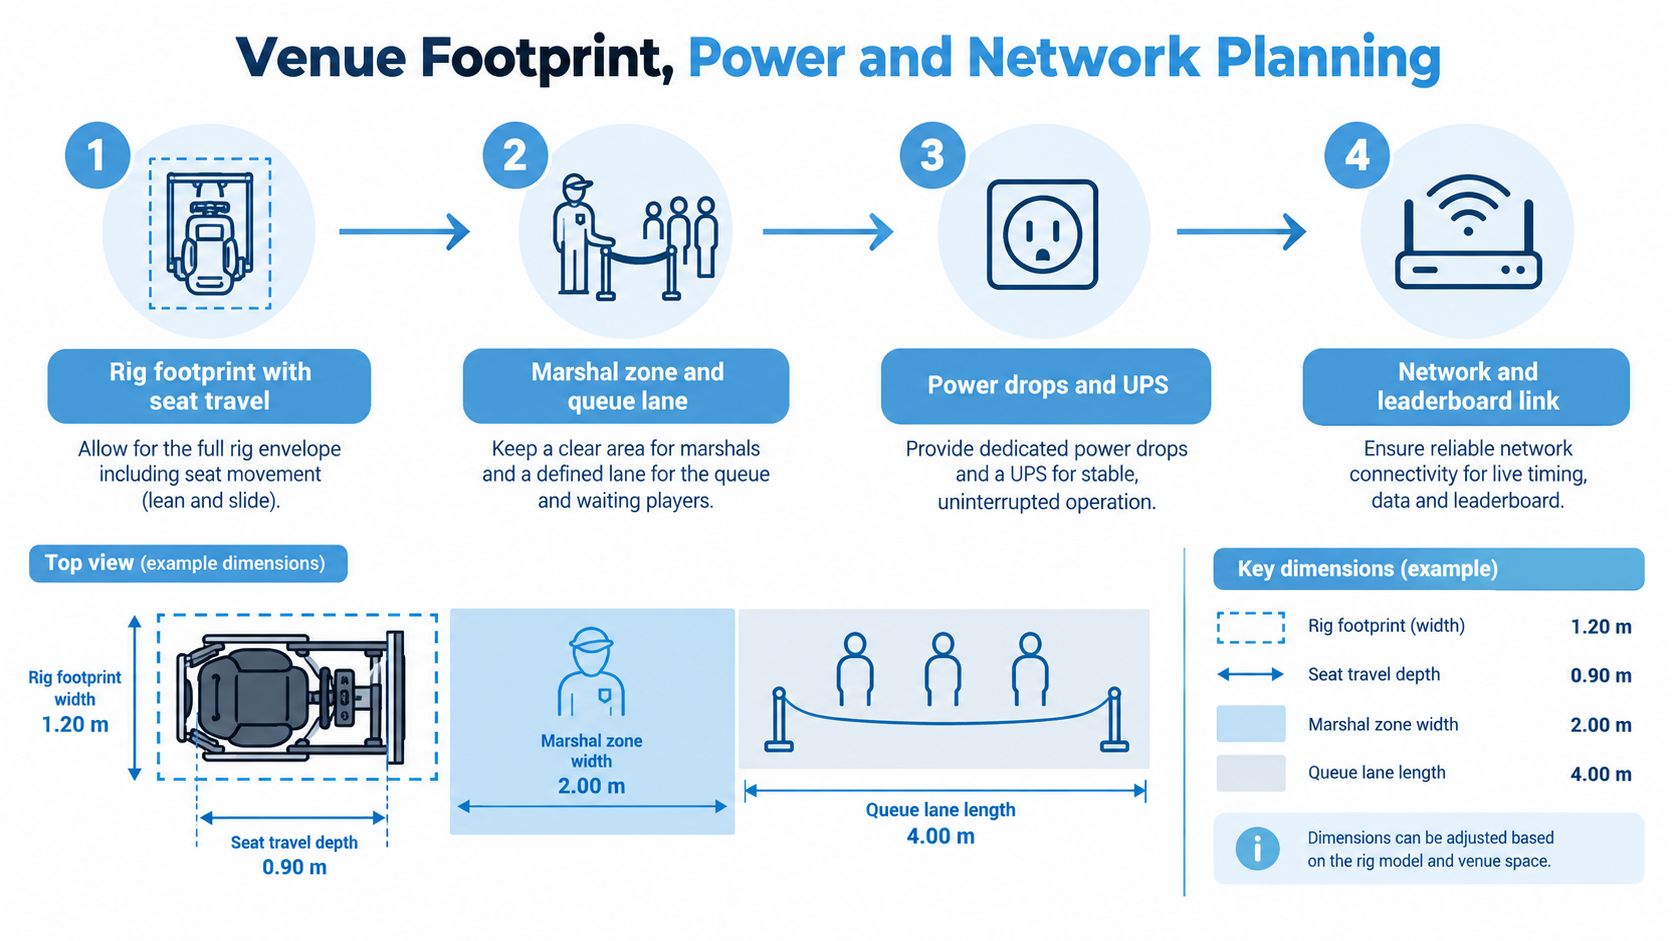
Marketing footprints rarely describe the working space. A rig measuring 2.4 metres by 3 metres may fit the stand drawing, but the operational zone can expand to 5 metres by 4 metres once seat travel, cabling, queue rails and a marshal position are included. That larger envelope is what the venue manager and fire officer need to understand.
The seat needs rear clearance and the operator needs access to the driver's side. A marshal must be able to pause the experience, assist a guest and reach the emergency isolation point without stepping through the queue. Keep the queue visible from the host position, then protect its edge with stanchions or a clearly marked floor route.
Confirm the building restrictions
Ask the venue for floor-loading information when using aluminium-profile rigs, motion elements, equipment cases or raised platforms. Mezzanines may carry different weight limits from the main hall, and a rig that is safe on a slab floor may need approval upstairs. Check the venue's rules for floor protection, drilling, ballast and cable ramps.
Overhead structures also need early review. Many UK exhibition centres work to a 2-metre rule for overhead structures, so confirm the specific venue standard before designing a header, lighting goalpost or branded gantry. The wording and approval process vary, which is why a production drawing must show height, access and escape routes rather than only the footprint.
Power should be planned as a circuit, not as a collection of plugs. A small rig may need a modest supply, while a larger PC, multiple displays, audio, lighting and telemetry hardware need a properly allocated feed. A 230V 16A supply is generally safer for an event rig than chaining extension leads across carpet, provided the venue electrician confirms the circuit and protection arrangement.
Use RCD protection where required, keep power and signal runs separated where practical, and label both ends of every cable. Network planning deserves the same attention. If the rig uploads telemetry, receives content updates or publishes a leaderboard, test the venue's SSID, VLAN permissions, DHCP reservations, latency and peak-time stability.
UK broadband access can become a genuine home and remote-testing constraint. About 600,000 premises still cannot realistically access gaming-viable broadband because they rely on legacy copper or satellite, while gaming-covered premises are defined by sub-20ms average latency (Currys sim racing setup guide). For an event, test wired connectivity where possible and measure peak-time jitter before promising live competition.
Use the PSW Events installation requirements as a practical prompt for the venue conversation. The final drawing should show the rig, marshal zone, queue, power drops, network point, screen sightline, audio direction and emergency access on one plan.
Build Day Configuration and Pre-Show Testing
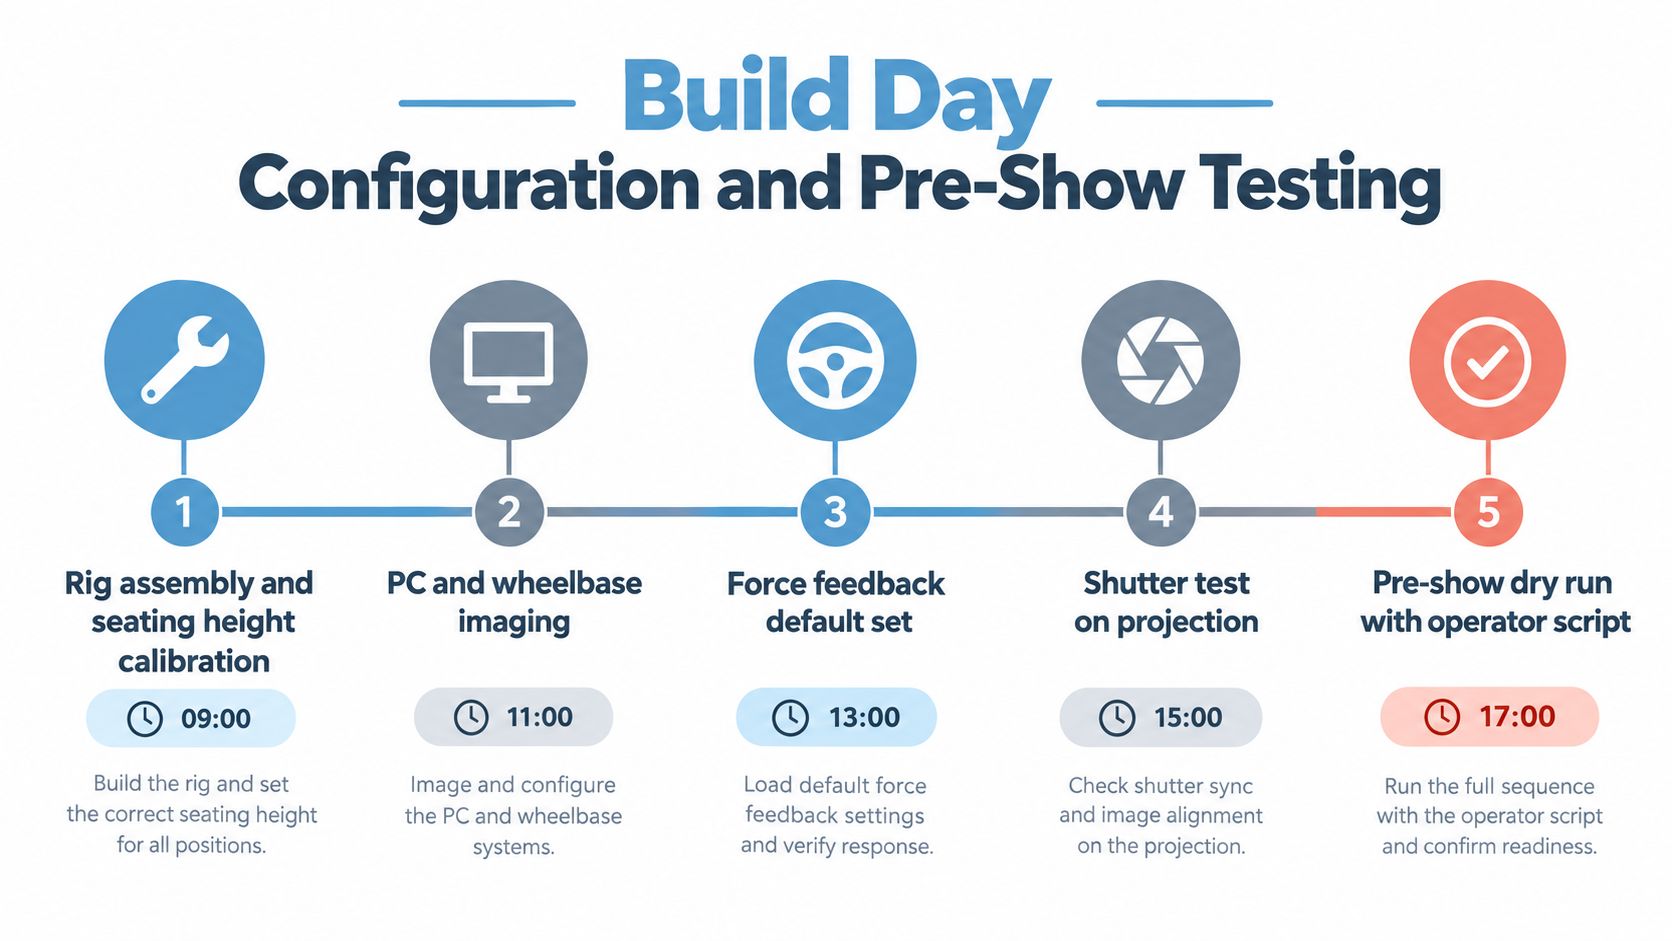
A dependable build day has a sequence, an owner for each decision and enough time to fail safely. The team shouldn't discover a missing display cable while guests are entering. Treat the day as a controlled rehearsal that ends with an operator who can explain the recovery process without calling the person who built the rig.
Assemble the physical system first
Start with the chassis, seat and pedal tray. Set seating height for the driver's sightline, then adjust fore and aft travel so the pedals can be fully depressed with a slight bend in the legs. Lock the wheel mount only after the seat and pedal relationship feels right. If the frame flexes, force-feedback detail and brake consistency suffer, so check every fastener after the first load test.
Next, image the PC or console, install the approved game build and apply the event configuration. Set the force-feedback default, map the shutter or projection control, and confirm the field of view from the driving position. For a console-based rig, use the system's fan curve and ventilation arrangement to stabilise thermals during a sustained four-hour block, rather than judging performance after a short menu test.
The supplier tools screen is where the detailed input work happens. Calibrate throttle, brake and clutch, then map the sequential shifter, handbrake and button box. Test every input in the actual game, not only in the wheelbase software. A button can appear correctly mapped in a utility and still trigger the wrong function once the event profile loads.
Test the network and the human process
The network check should cover leaderboard telemetry, latency, VLAN tagging and DHCP reservations on the venue SSID. If live results fail, the operator needs a local fallback that still records a guest name, lap time and photo reference. Don't make the entire guest journey dependent on a remote service.
End with a half-hour rehearsal using stand-in guests. Ask one person to rush, one to need help adjusting the seat and one to stand in the queue while the operator runs the script. That rehearsal exposes vibration drift, audio bleed into neighbouring stands, loose cable ramps and awkward photo angles that a technical checklist misses.
Show-day test: Run one complete session from queue greeting to result delivery. If the operator can't reset the rig while speaking to the next guest, the configuration still needs work.
Branding, Guest Flow and On-Site Operation
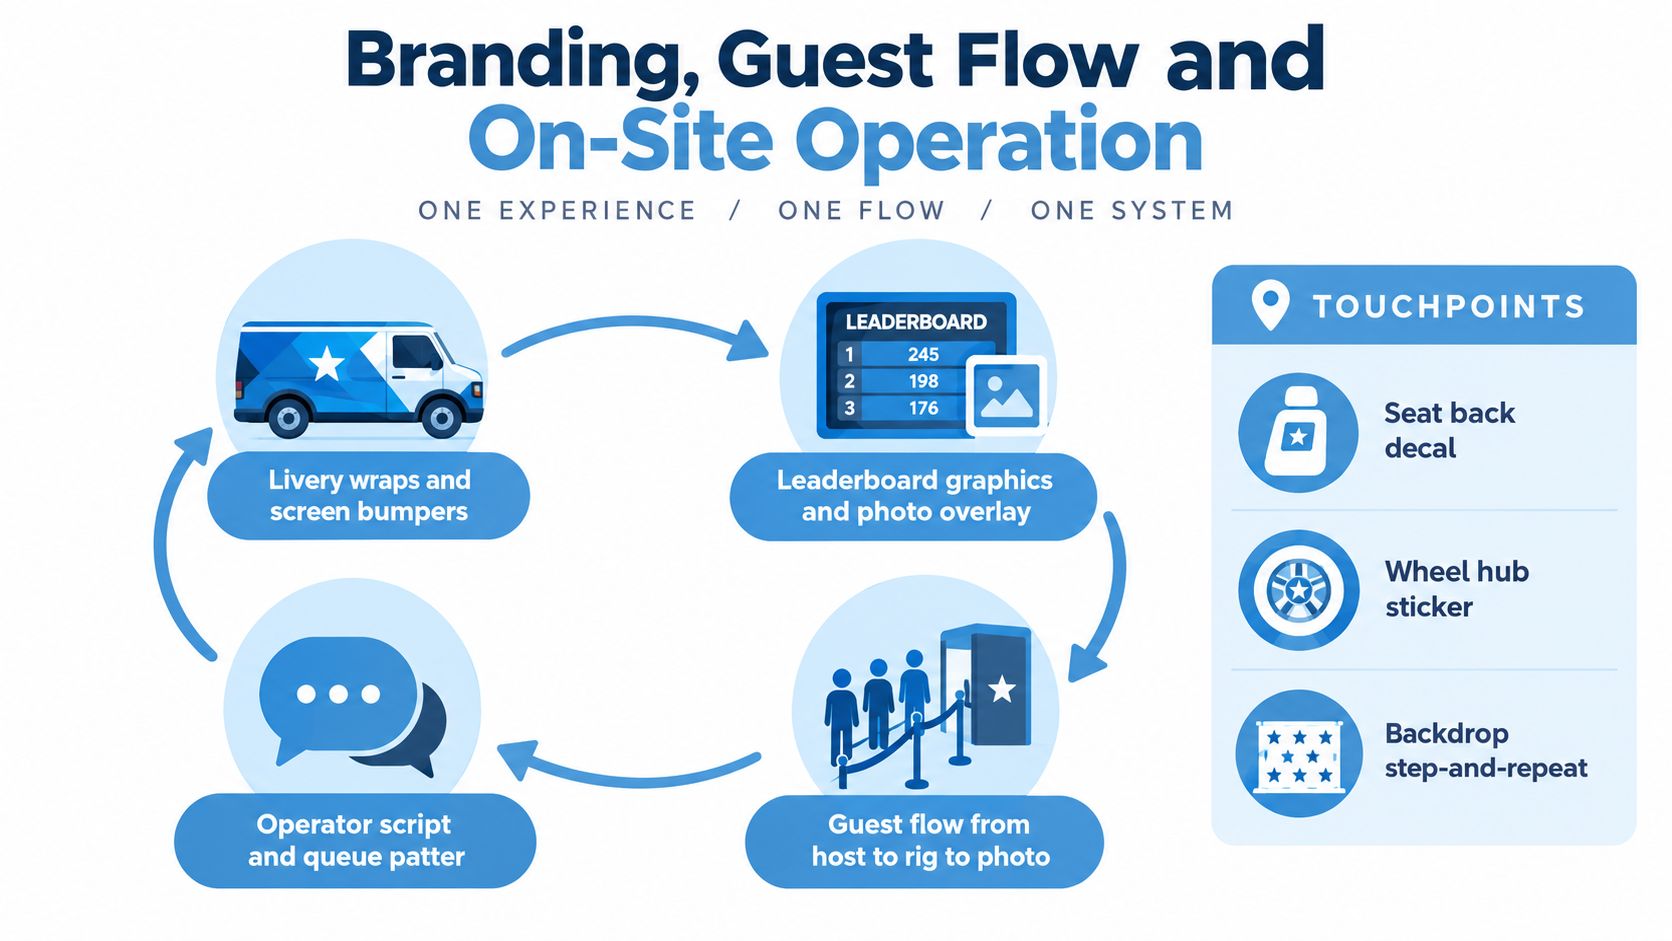
Branding works best when it follows the guest through the experience. A livery wrap gets attention from the aisle, but the strongest recall often comes from smaller touchpoints: a seat-back decal, wheel-hub sticker, branded lap screen and a photo overlay that carries the guest's name and result.
Build the journey as a loop. The queue marshal confirms eligibility and manages the next slot. The briefing host explains the controls and safety points. The seated driver completes the run. A debrief screen presents the lap time, leaderboard position and sharing option. Each stage should have a named operator and a defined handover.
Design the timed session
Use lap sheets with 90-second or 180-second slots, choosing the length to match the venue's fire capacity, audience patience and content complexity. A short slot suits a high-footfall exhibition. A longer slot gives a hospitality guest more time to settle into the seat and creates a stronger sense of achievement.
The operator script should cover five moments:
- Welcome: Explain the challenge in one sentence and confirm the guest's name.
- Safety briefing: Point out the emergency stop, steering resistance and pedal layout.
- Driving instruction: Give one practical objective, such as braking before a visible marker.
- Photo capture: Tell the guest when the image will be taken and where it will appear.
- Lead capture: Ask for consent at the point of value, alongside the result or shareable image.
Prepare a recovery script for content failure. The operator should be able to say that the session is being moved to the backup profile, offer the next available slot and preserve the guest's place without blaming the venue or the technology.
Make the data useful
Leaderboard graphics should be legible from the queue and refreshed without manual spreadsheet work. Photo overlays can carry the brand, circuit name, guest name and lap time, while a debrief screen gives the operator a natural moment to request a QR scan or marketing consent.
At the end of the event, export lap data, session counts and consented lead records into the agreed CRM format. A follow-up offer tied to a recorded time is more specific than a generic thank-you email. It gives the sales team a clear conversation starter and lets the client compare participation with the original brief.
For larger outdoor or touring formats, the operational environment matters as much as the rig. Guidance on Pacific Mobile Structures event trailers is useful when planning a separate registration, briefing or control space that keeps technical activity away from the guest route.
Build vs Hire for Racing Simulator Setup
For a 2026 UK corporate event, the build-versus-hire decision depends on repetition, control and operational breathing room. A single activation usually rewards a turnkey solution. A roadshow across three venues may justify ownership if the team has storage, transport and a technical owner. An annual stand can sit between the two, particularly if the brand needs a controlled software and visual identity.
An in-house build gives the marketing team control over the game profile, branding and data flow. It also creates responsibility for depreciation, storage, compatibility, repairs, software updates and the person who knows how to recover the rig at short notice. A hired setup generally trades some equipment choice for delivery, installation, an operator and a defined support process.
| Factor | In-House Build | Turnkey Hire |
|---|---|---|
| Capital | Requires upfront equipment purchase | Uses an agreed event or project rate |
| Storage | Client carries storage and asset handling | Supplier usually manages equipment between events |
| Software | Greater control over profiles and integrations | Supplier provides an approved, tested configuration |
| Branding | Can be permanently integrated | Applied as wraps, graphics and overlays for the event |
| Staffing | Needs an internal technical owner and operators | Can include delivery crew and on-site operator |
| Recovery | Client manages faults and spares | Contract should define replacement response time |
| Touring | Works if transport and venue planning are resourced | Faster to redeploy between venues |
| Risk | More exposure to compatibility and downtime | Risk shifts to supplier, but scope must be written clearly |
The key contract question is not just whether an operator is present. Specify what happens if the wheelbase, PC, display or network-dependent feature fails. Agree the replacement response time, backup equipment, data handling, branding approval and cancellation terms before the purchase order.
A specialist supplier can also reduce the number of production interfaces. PSW Events provides racing seat simulator hire with a three-pedal system and six-speed shift gears, with simulators available for daily or longer-term hire and event setup support. That model suits planners who want the equipment, logistics and on-site operation handled as one workstream.
Decision rule: Build when you have repeat events, secure storage and an internal technical owner. Hire when the event is occasional, the venue changes or the cost of a visible failure is higher than the saving on equipment.
Use the PSW Events racing simulator hire service when comparing a supplier's scope, but ask every provider to separate equipment, transport, installation, staffing, branding, contingency and data services in the quotation.
H&S, Insurance and Post-Event Measurement
Verification is the final production stage, not paperwork added at the end. The pre-show risk assessment should list each component as a potential hazard, including the wheelbase, moving seat parts, pedal tray, screens, cases, cable ramps and queue barriers. Record the control for each item and make sure the operator knows which control they own.
Before opening, the venue and client team will usually check cable management, trip protection, equipment stability, emergency access and general presentation during a walk-around. Lodge the relevant LOLER and PAT testing certificates on arrival where required, and confirm the public-liability and equipment-insurance levels demanded by the venue, agency or brand team. Insurance wording can vary, so use a broker's practical guide to how to get liability insurance as background, then obtain confirmation for the specific event.
Control the load-in and load-out
Put crates, monitors, seats, cable ramps and branding on a timed run-sheet. The correct order is usually heavy structure first, then seat and controls, then displays, power and signal, followed by graphics and finishing. At strike, reverse the process only after data exports, photographs and client sign-off are complete.
Keep a simple decision tree for common problems:
- Missing flight case: Confirm its last scan, identify whether the rig can open without it and escalate to the production lead.
- Late courier: Protect the guest area, move the build sequence to available tasks and tell the venue contact when the revised opening decision will be made.
- AV strike clash: Stop movement, agree a shared route and keep cases out of guest circulation until the AV team has cleared the path.
A suitable event risk assessment template helps structure the review, but it doesn't replace a site-specific assessment. The final document should reflect the actual venue, equipment, staffing, audience and operating hours.
Measure the brief, not just the lap time
Track dwell time, session counts, fastest laps, QR scans, lead captures and photo shares where the consent process allows it. A brand focused on footfall may prioritise completed sessions and queue conversion. A sales team may care more about qualified lead capture and follow-up consent. A hospitality client may value dwell time and guest satisfaction.
Frequently asked questions
How often should equipment receive PAT testing? There isn't one universal interval for every event asset. Follow the competent person's assessment, the equipment history and the venue's requirements, then lodge current records before arrival.
What indemnity wording should the contract contain? Ask the venue or agency for its required wording before appointing the supplier. The supplier should confirm exactly which activities, equipment and personnel the policy covers.
Who carries sub-hire liability? State this explicitly. If a supplier sub-hires a rig, operator or transport service, the contract should identify responsibility for insurance, testing, damage, replacement and data handling.
PSW Events provides racing simulator hire with planning, branding, logistics, installation, on-site staffing and H&S compliance for corporate events across the UK and internationally. Visit PSW Events to discuss a racing simulator setup that fits your venue plan, guest flow and measurement objectives.